How to Draw the Center Line of the Torso: A Figure Drawing Guide
Learn how to use the torso's center line and anatomical landmarks to create more accurate, three-dimensional figure drawings.
The center line of the torso is one of the simplest tools we can use to make our figure drawings feel three-dimensional. A single curved line can tell us which direction the torso is facing, how it's bending, and how its surface moves through space. When we're first learning figure drawing, it's easy to focus on the outside contour of the body. We look at the shoulders, waist, and hips, trying to capture the shape we see. But a convincing silhouette doesn't necessarily mean we've communicated the volume of the figure.
By learning how to locate the center line using anatomical landmarks, we can turn a basic torso shape into something that feels solid and believable. And the nice thing is, we don't need an advanced understanding of anatomy to start using it. In this guide, we'll look at how the center line works, how to identify it on the front and back of the torso, and how to use it to give our figure drawings a stronger sense of volume.
Centerline vs Line of Action
- Centerline
- Gesture line (line of action)
What Is the Center Line of the Torso?
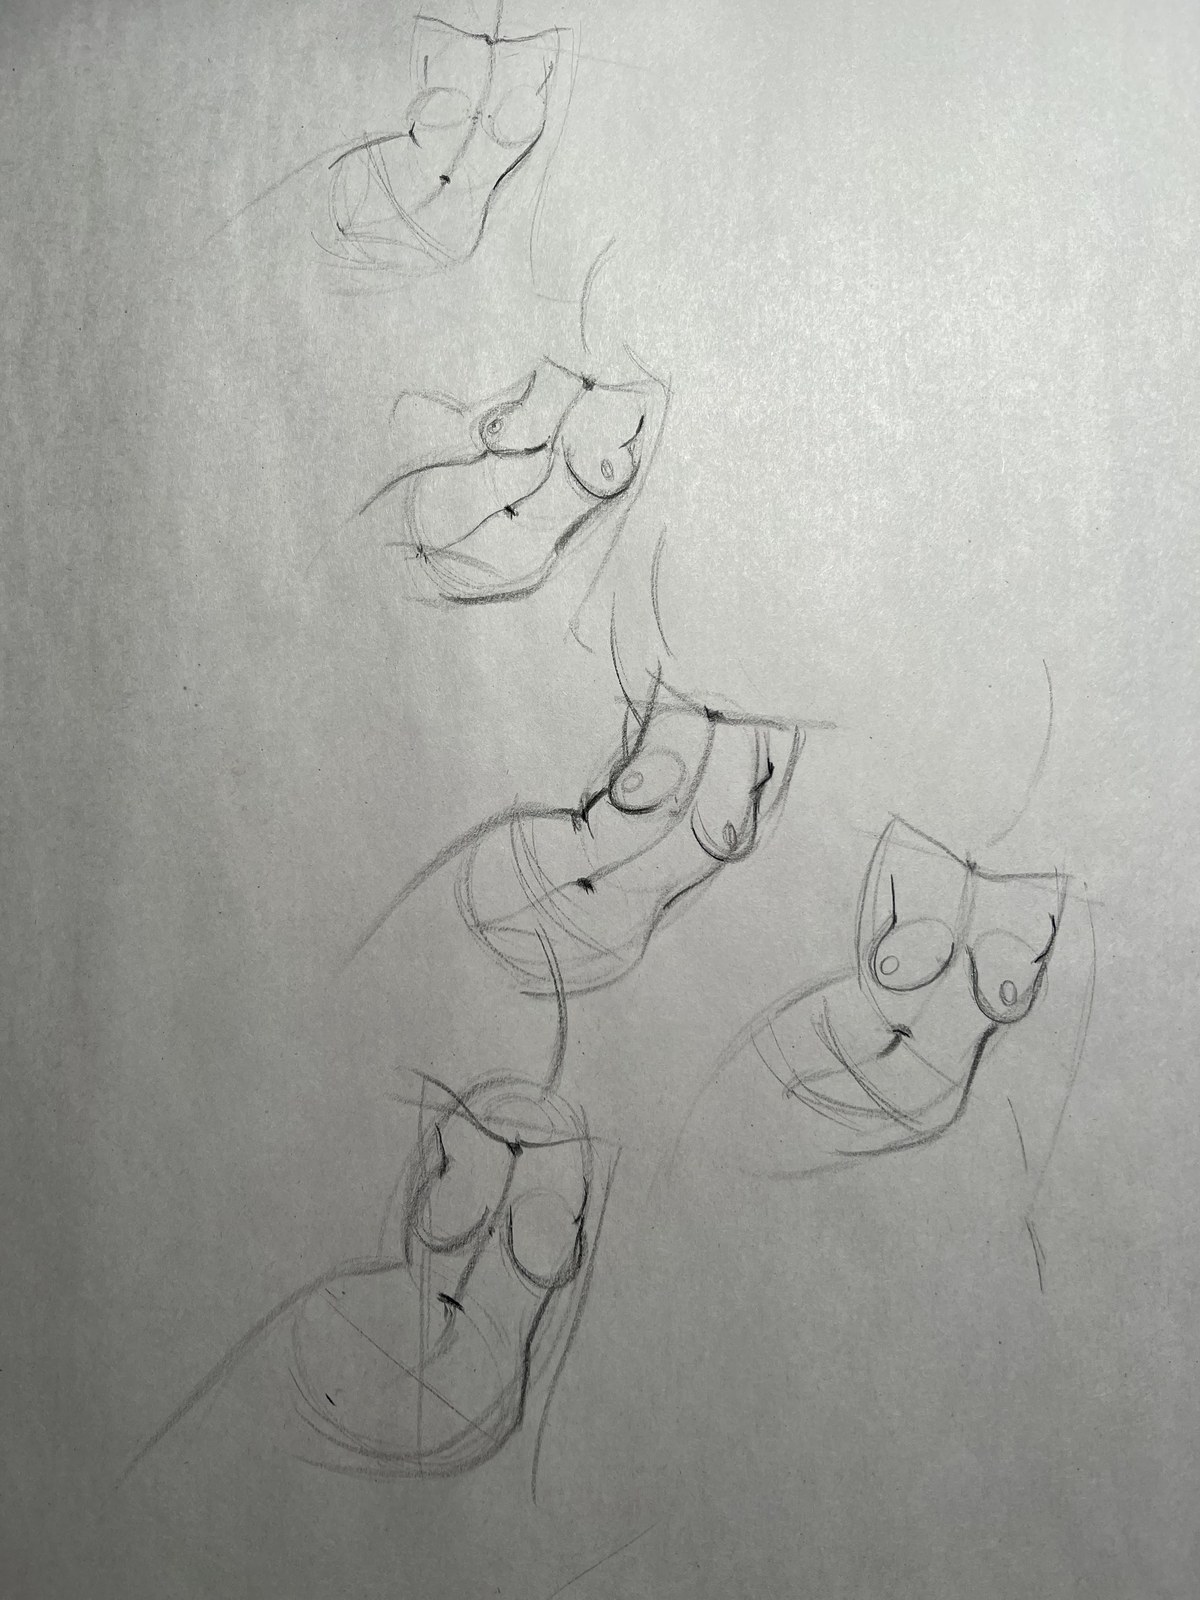
The center line of the torso is an imaginary line that follows the middle of the body's surface, dividing the torso into left and right sides. In figure drawing, we use it as a construction line to describe the orientation and three-dimensional volume of the torso. Think of drawing a line down the center of a cylinder. When we look directly at the front of that cylinder, the line appears straight. As we rotate the cylinder, that line appears closer to one silhouette edge. Its position tells us which direction the marked surface faces.
The same principle applies to the human torso, although the torso is a much more complex shape. Our bodies aren't perfect cylinders. The rib cage, abdomen, and pelvis all have different forms, and the torso can bend, twist, and stretch. As a result, the center line can change direction several times as it travels down the body.
When we draw the center line correctly, we're doing more than marking the middle of the torso. We're describing how its surface turns in space.
The Center Line Is Not the Same as the Line of Action
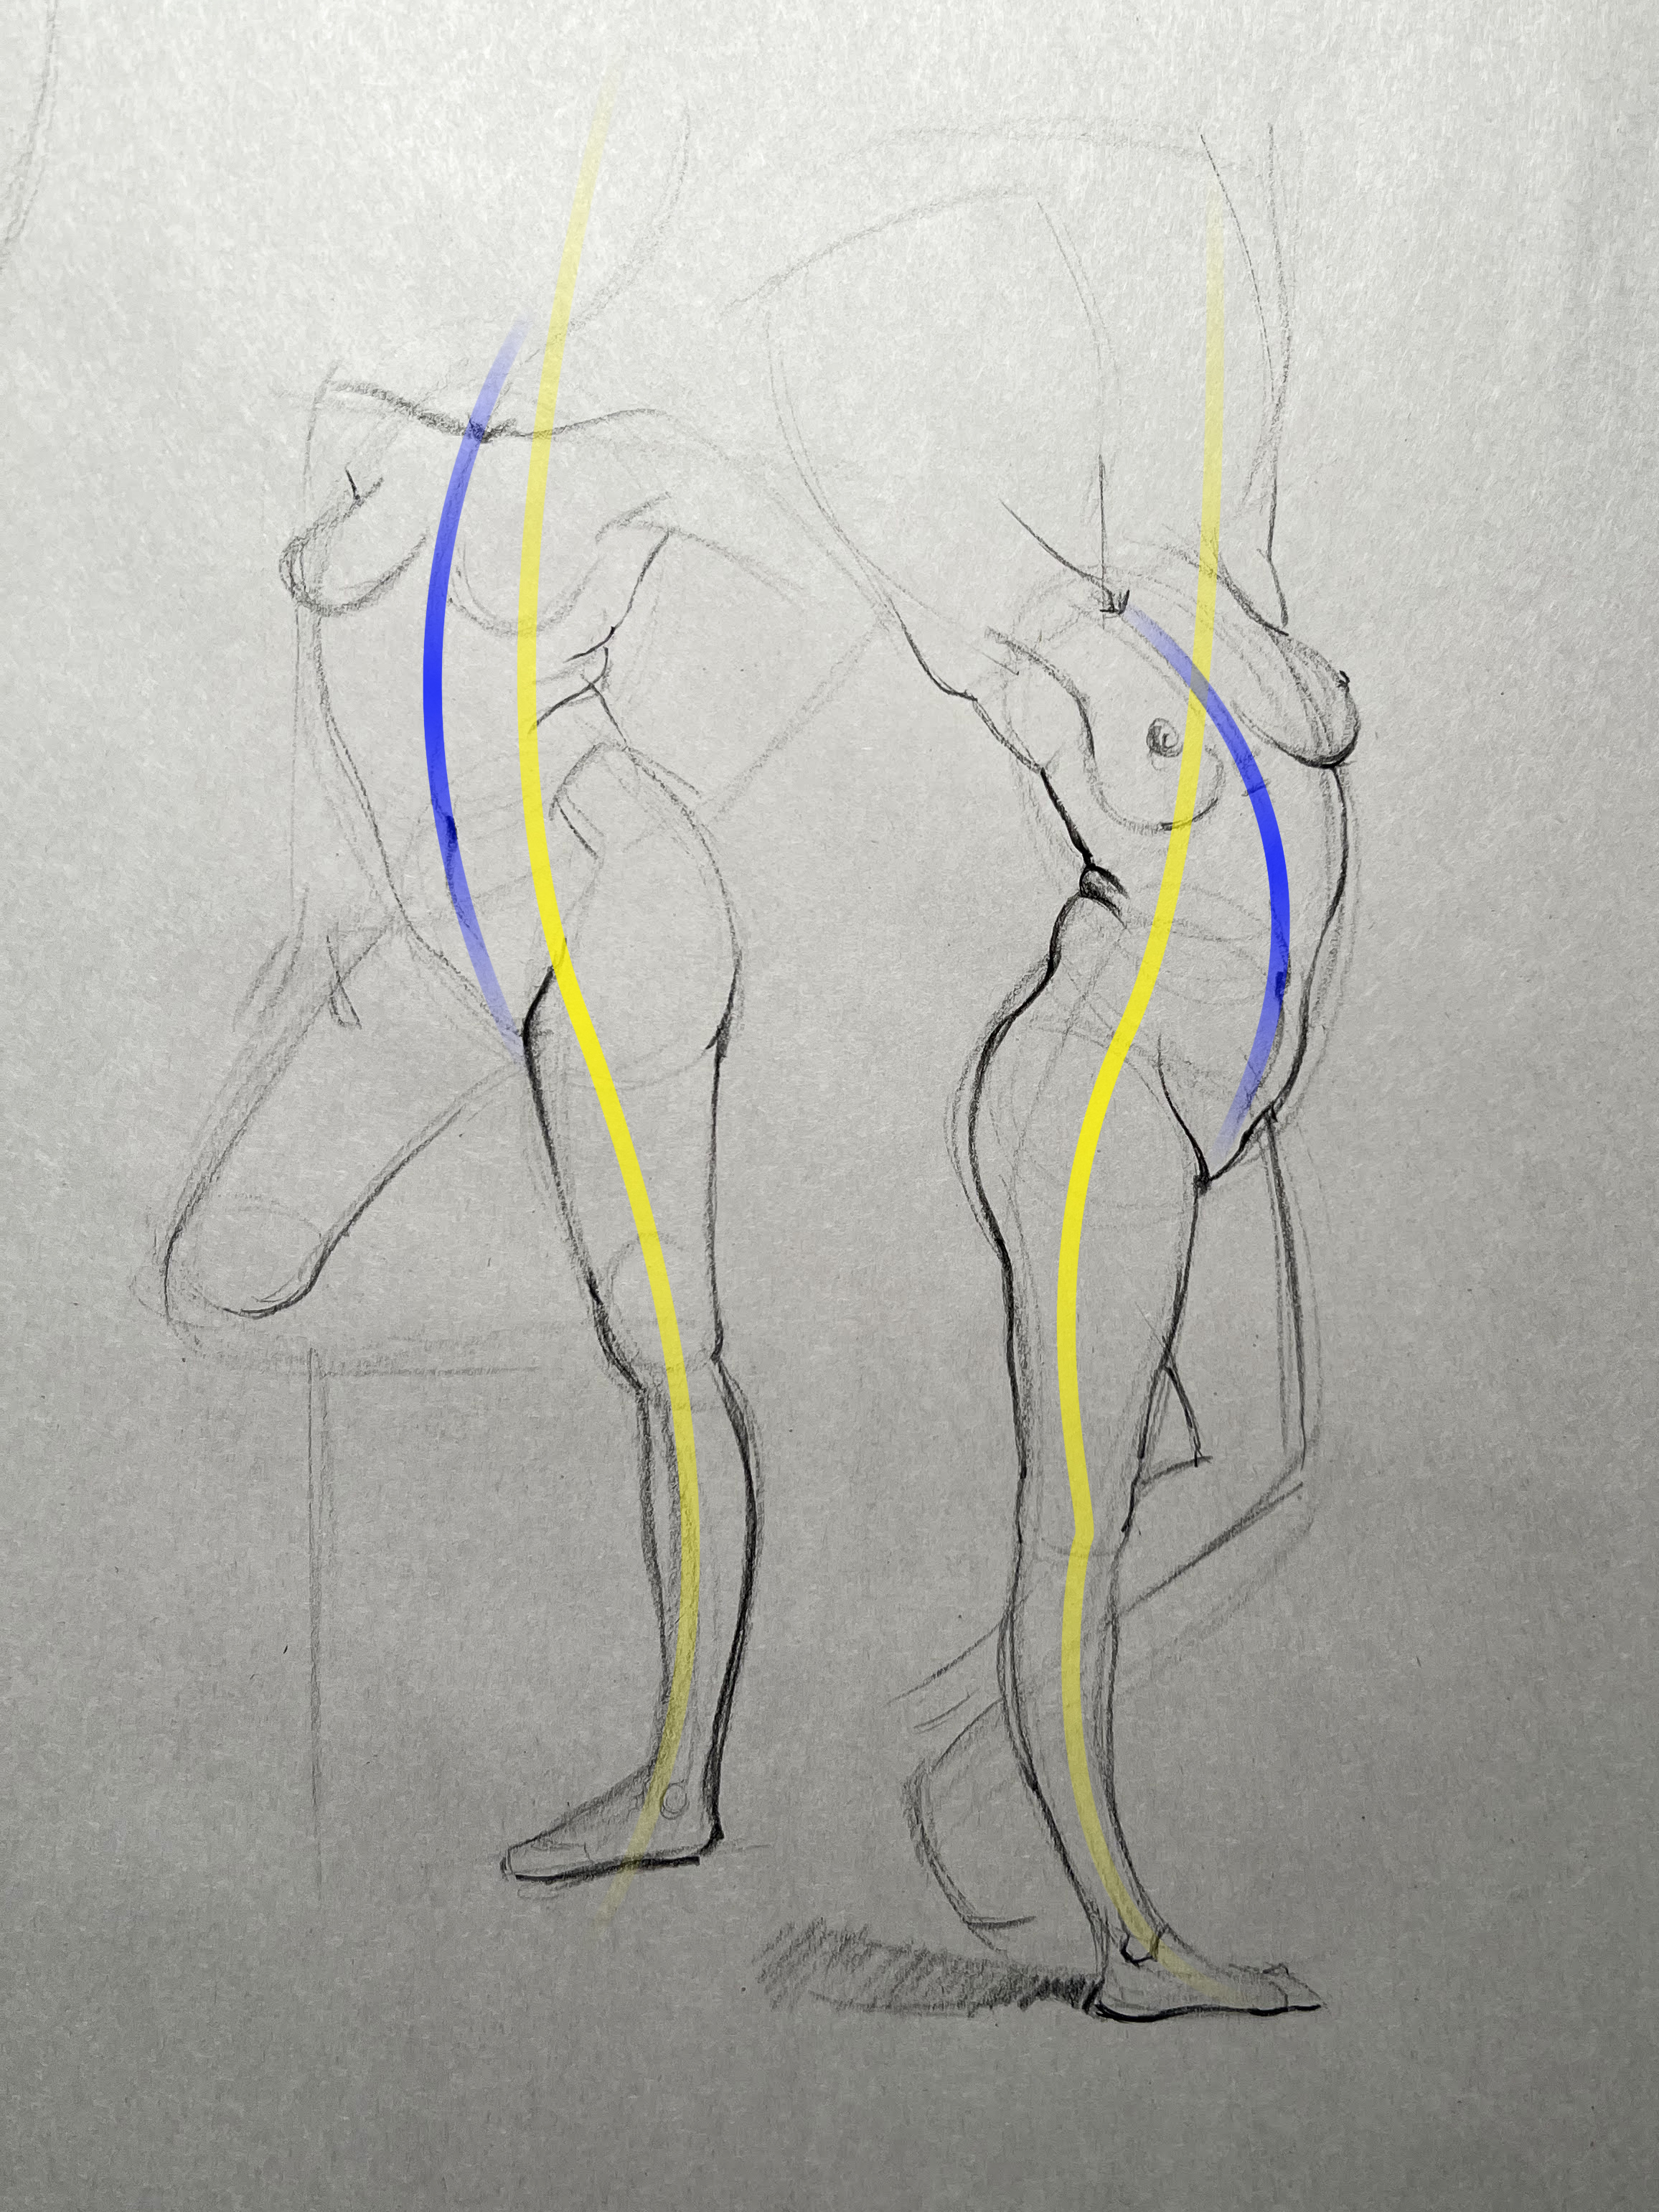
It's worth making this distinction because the two concepts are easy to confuse. The line of action is a simplified gesture line that describes the overall movement or directional flow of a pose. It may run through the entire figure, and it doesn't have to follow the body's actual surface.
The center line, on the other hand, follows the surface of the torso and helps us understand its orientation. A line of action might help us capture the energy of a figure leaning forward, while the center line tells us how the torso is rotated and bent within that movement.
For the wider construction workflow, read Axis Lines Explained and our line of action guide.
How the Center Line Communicates Volume and Direction
One of the most important things to understand about the center line is that its appearance changes depending on how we're viewing the torso. We can demonstrate this with a simple torso shape before introducing any anatomical detail.
The Center Line on a Front-Facing Torso
On a simplified, symmetrical torso facing directly toward us, the center line appears close to the middle of the visible form. It establishes symmetry, though it may tell us little about depth by itself. The rib cage, abdomen, and pelvis still have different volumes. Look for their surface changes even when the overall center line appears relatively straight.
How the Center Line Changes When the Torso Rotates
As the torso turns, its front center line shifts away from the midpoint of the visible silhouette. In a three-quarter view, one side of the front surface appears narrower than the other. A curved or segmented center line can describe the changing surfaces of the chest, abdomen, and pelvis. A straight guide on a simple cylinder can remain straight when rotated; curvature depends on the form and pose, not rotation alone.
Compare the center line with the actual direction of the front surface. The farther the torso turns, the closer parts of the line may appear to a silhouette edge, and some sections may disappear from view.
How Bending Changes the Center Line
When the torso bends, the relationship between the rib cage and pelvis changes. One side may compress while the other stretches, and the center line follows those changes through the chest and abdomen. A sideways bend combined with a twist can produce several changes in direction. Each change should describe the underlying form; avoid adding a generic S curve just to make the pose look dynamic.
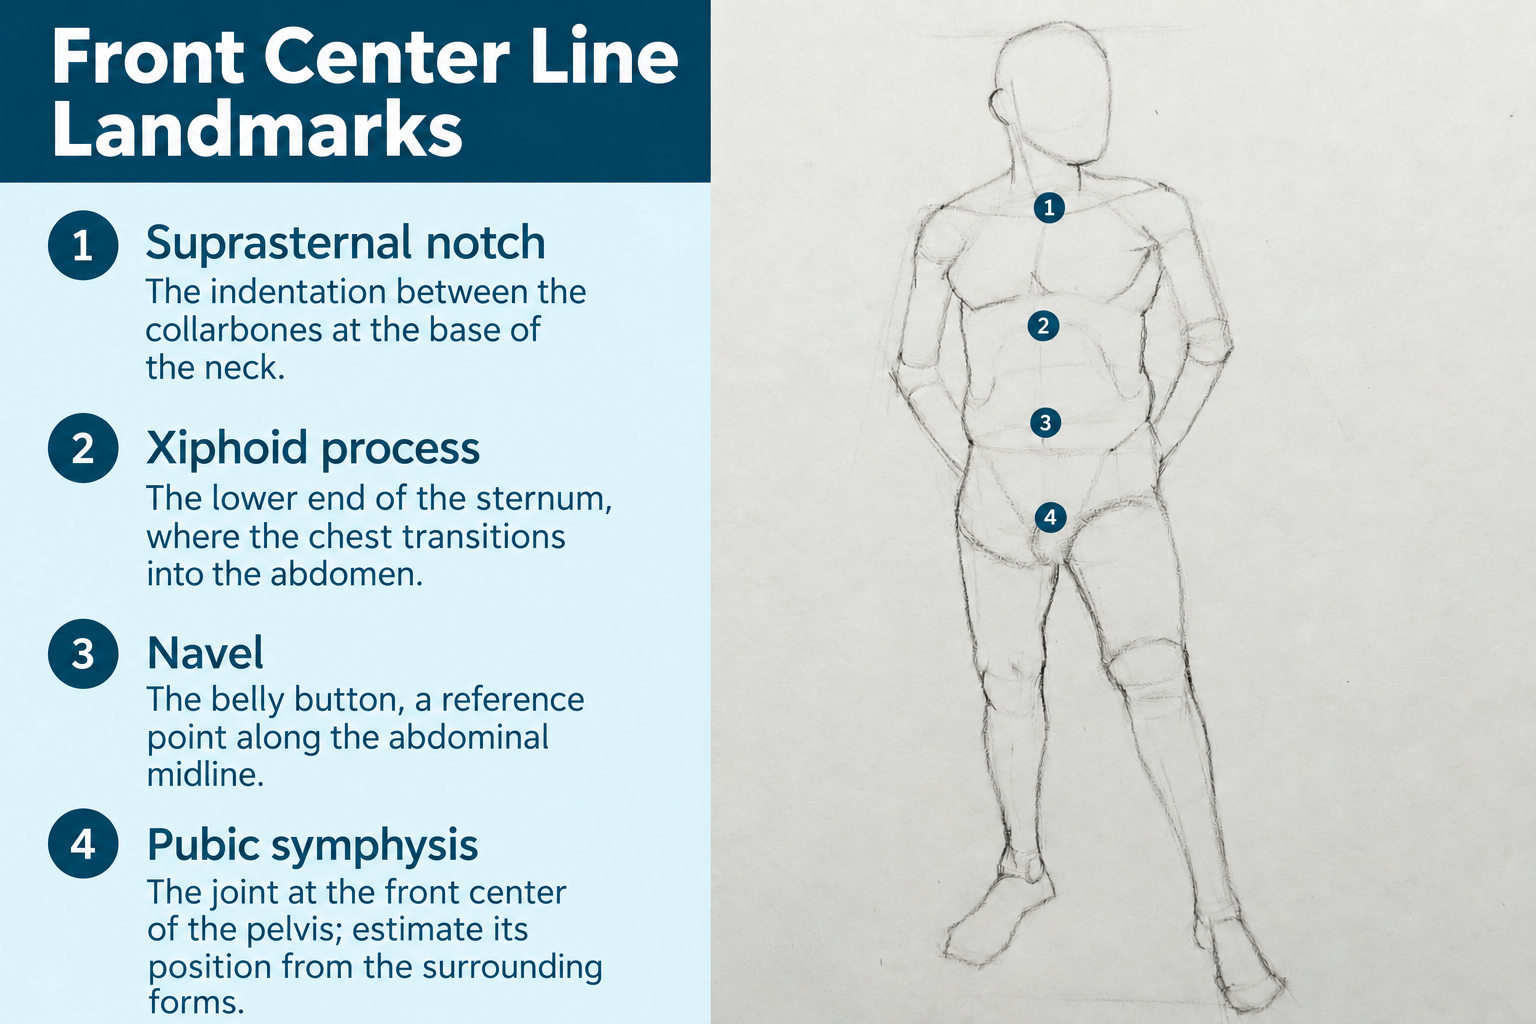
Anatomical Landmarks Along the Front Center Line
The human body provides several landmarks that help us locate the center line. Some are bony structures that create visible changes beneath the skin, while others are surface features that are easier to recognize. We don't need to memorize every bone and muscle in the torso. But understanding where these particular landmarks are located gives us a reliable way to construct the center line.
Let's work our way down the front of the body.
For more photo references, explore our guide to bony landmarks for figure drawing.
Suprasternal Notch
The suprasternal notch is the small indentation at the base of the neck, between the clavicles and just above the sternum. Look for the depression where the collarbones approach the base of the throat. Use it as an anchor point for the chest. Compare its position with both outer contours rather than automatically placing it in the middle of the drawing. Is it closer to one side, and does that placement agree with the direction of the rib cage?
Sternum
The sternum, or breastbone, is the long, flat bone at the center of the chest. It connects to the ribs through cartilage and gives us a useful direction through the rib cage. Draw the direction between the suprasternal notch and the lower end of the sternum. The sternum is relatively rigid: rotation alone doesn't turn a straight segment into a curve. Let the broader center line change direction as it passes between the chest, abdomen, and pelvis.
Xiphoid Process
The xiphoid process is the small structure at the bottom of the sternum. Its approximate location helps us identify the transition from the chest to the upper abdomen. It may create a visible prominence, especially in some extended poses, but it can also be difficult to see. Estimate the lower end of the sternum from the surrounding chest structure when the landmark is hidden.
Navel
The navel sits along the body's anterior midline and is often easier to recognize than the skeletal landmarks. Compare it with the lower sternum and both contours of the abdomen. Avoid automatically placing it directly beneath the suprasternal notch. In a twisting or bending pose, these landmarks can appear offset, revealing how the abdominal surface changes direction.
Linea Alba
The linea alba is a band of connective tissue along the middle of the abdominal wall. It separates the left and right rectus abdominis muscles and extends from the xiphoid process toward the pubic symphysis. Its name means "white line." On a living model, parts of its path may appear as a subtle groove, particularly when the abdominal muscles are defined. If it isn't visible, use the navel and surrounding landmarks to estimate the abdominal midline.
Pubic Symphysis
The pubic symphysis is the joint where the left and right pubic bones meet at the front of the pelvis. It establishes the lower end of the front torso's center line. This landmark is usually difficult to identify directly on the surface. Use the direction of the lower abdomen and the surrounding pelvic form to estimate its position. Keep an inferred mark light rather than forcing a visible detail into the drawing.
How to Draw the Center Line on the Front of the Torso
Now that we understand the anatomical landmarks, we can use them to construct the center line. If we begin by drawing a long curve through the torso, we're essentially guessing where the center line should go. By identifying a few reference points first, we give ourselves a much better foundation.
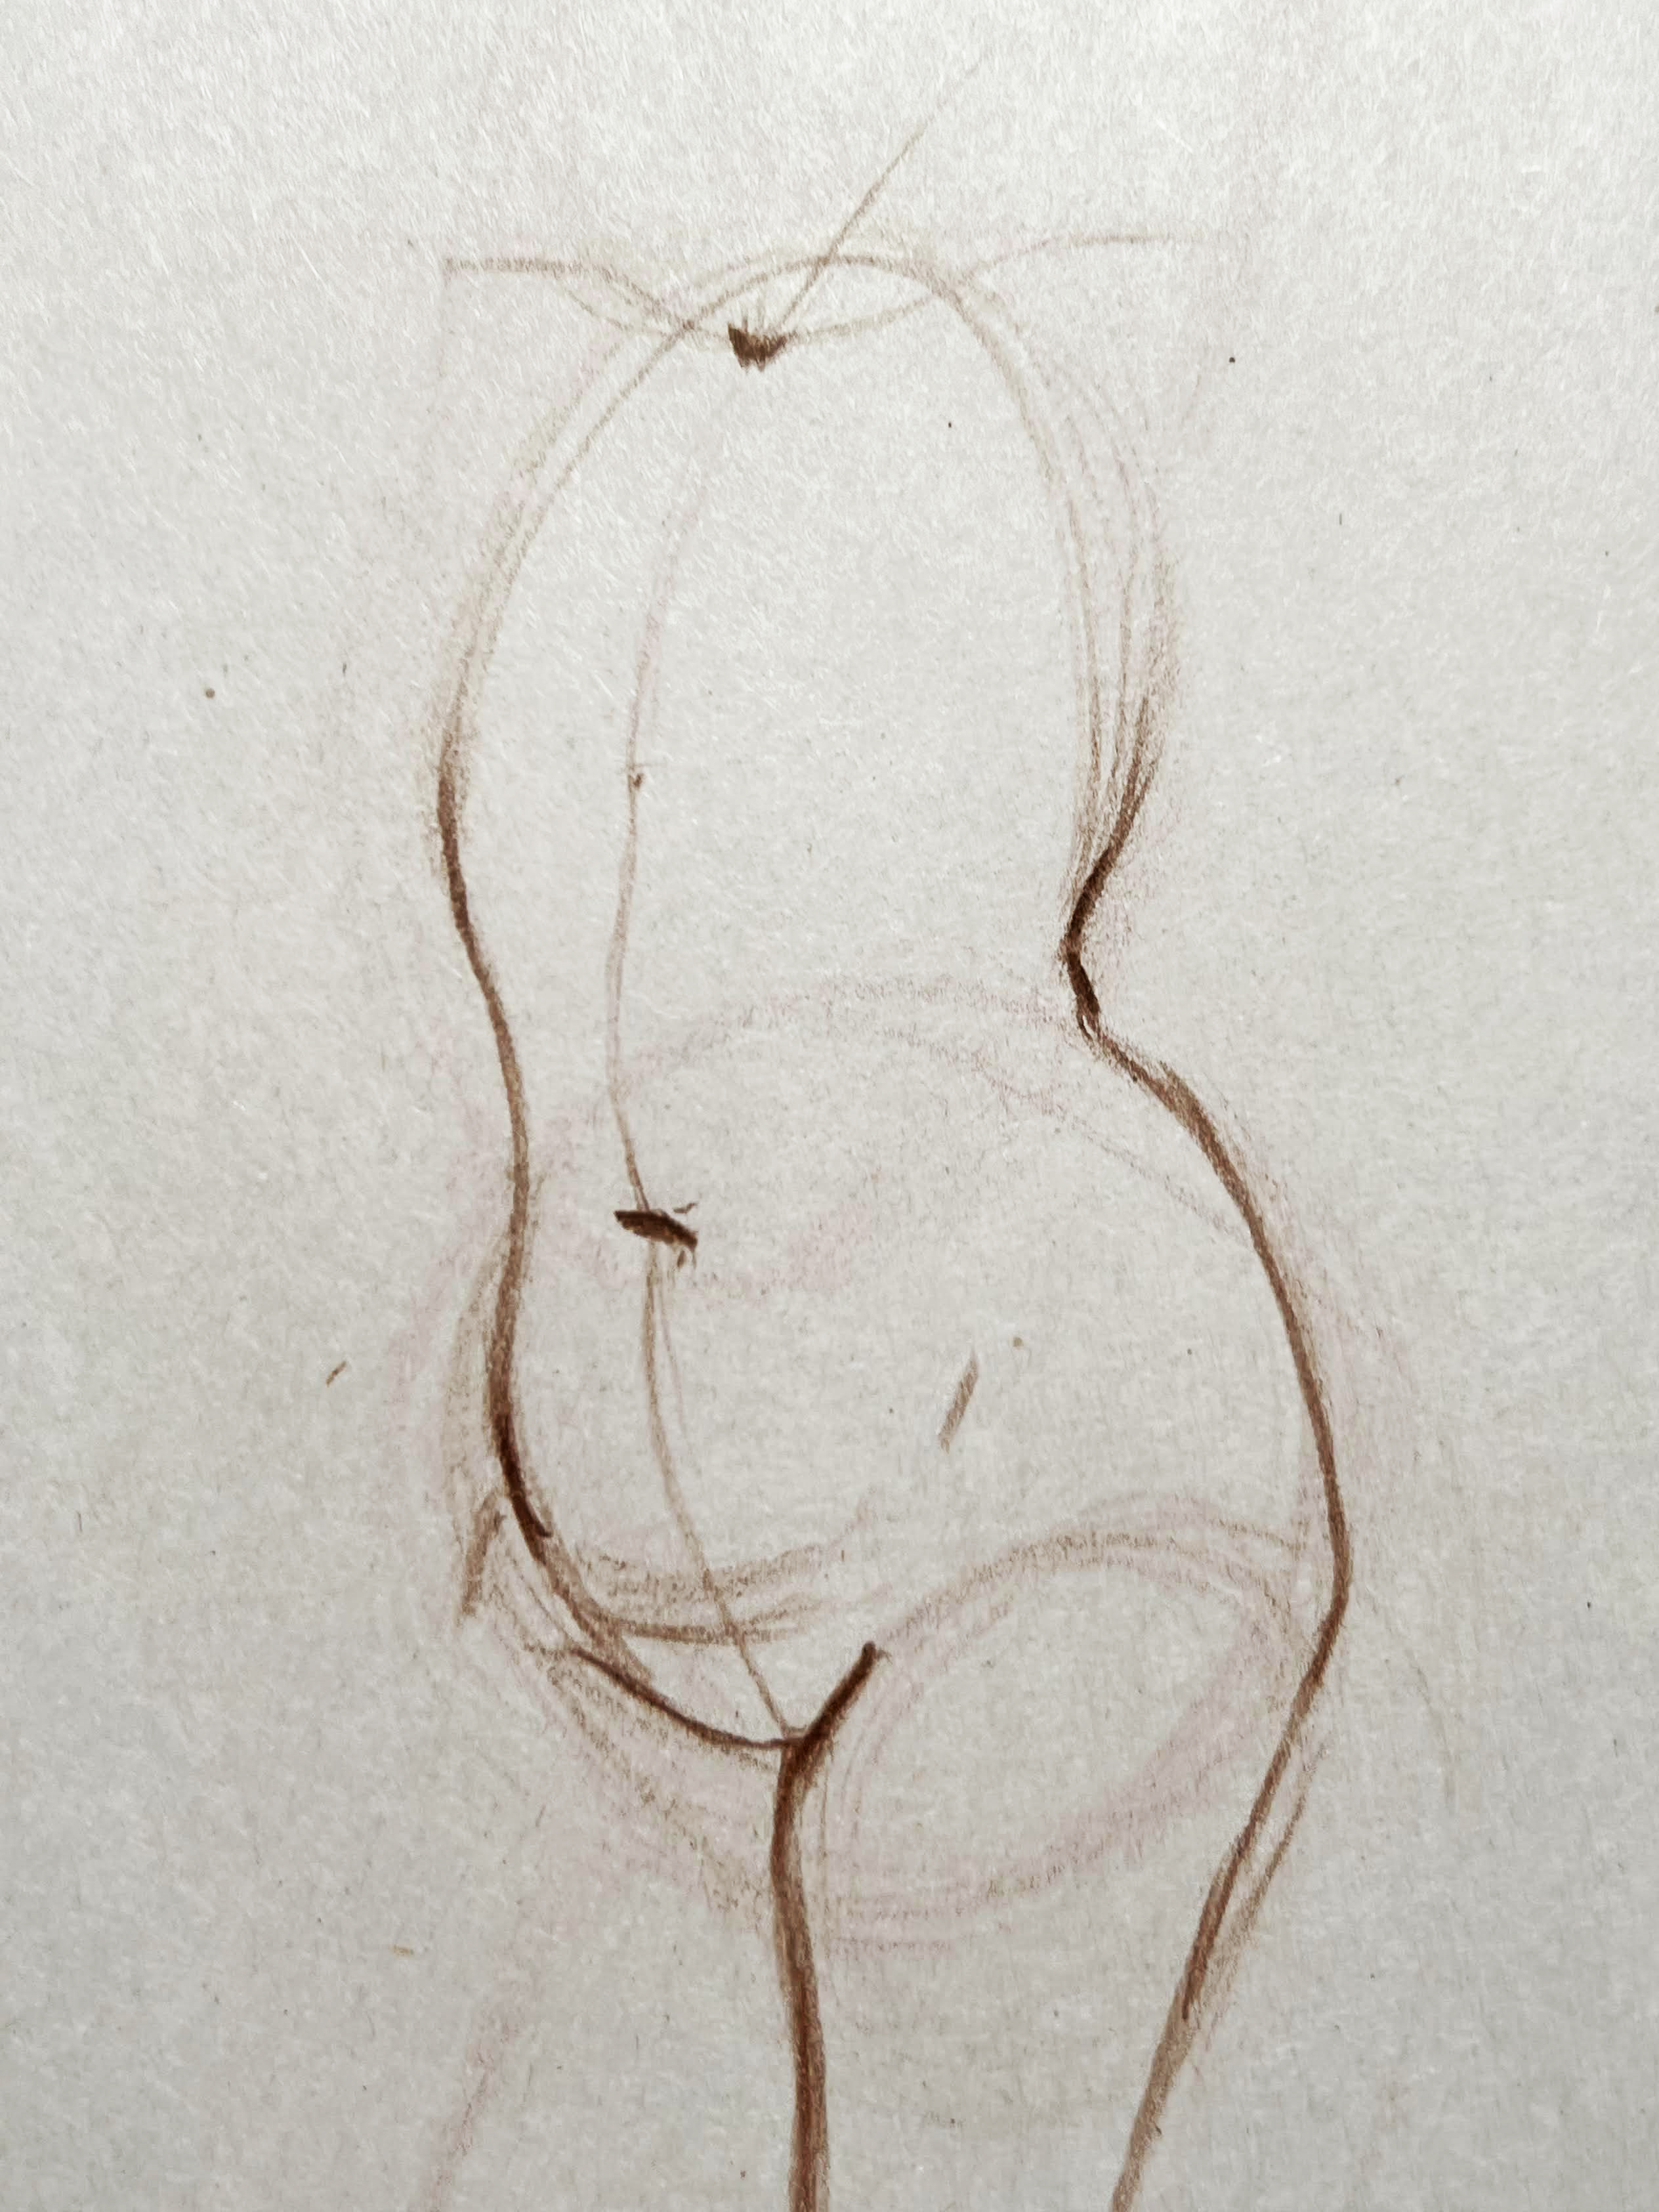
Step 1: Establish the Basic Torso Shape
Begin with a simplified torso volume. At this stage, focus on the overall direction of the rib cage and pelvis. We don't need to draw individual muscles or detailed anatomy. The basic shape should communicate whether the torso is upright, leaning, bending, or rotating. Pay attention to the outer contours, particularly where one side compresses and the other stretches.
These contours will help us judge the position of our center line.
Step 2: Locate the Suprasternal Notch
Find the indentation at the base of the neck and mark it lightly. A small V-shaped mark is usually enough. Before moving on, compare its position to both sides of the torso. If the torso is rotated, the notch may appear noticeably closer to one edge. This placement is important because it helps establish the direction of the chest.
Step 3: Find the Xiphoid Process
Next, identify the approximate bottom of the sternum. If the xiphoid process is visible, use it as a reference. Otherwise, estimate its position based on the structure of the chest. Compare its location with the suprasternal notch. Are the two landmarks nearly vertical, or does the line between them angle across the torso?
This relationship gives us the direction of the sternum.
Step 4: Locate the Navel
Find the navel and place a small mark. Compare its position with the xiphoid process and the outer contours of the abdomen. This is particularly important in twisting poses, where the navel may appear shifted relative to the chest. Avoid automatically placing it directly beneath the sternum.
Step 5: Estimate the Pubic Symphysis
Identify the approximate location of the pubic symphysis at the front of the pelvis. You may not be able to see the landmark directly, but the direction of the lower abdomen can help you estimate its position. Again, compare its location with the landmarks above it. By this point, we should have several points that describe the center of the torso from the neck to the pelvis.
Step 6: Connect the Landmarks
Now we can connect our landmarks with a flowing line. Start at the suprasternal notch and follow the sternum toward the xiphoid process. Continue through the abdomen, passing through the navel and moving toward the pubic symphysis. The line shouldn't be forced into one continuous, perfectly smooth curve if the body's surface suggests changes in direction.
Instead, let the anatomical landmarks guide its shape.
Step 7: Refine the Center Line
Once the center line is established, compare it against the rest of the torso. Does it communicate the direction the chest is facing? Does it follow the abdominal surface? Does its placement agree with the outer contours? Make small adjustments where necessary. Some sections may be more visible than others, so there's no need to give the entire line the same weight.
Use lighter marks for areas you're estimating and stronger marks where the anatomy creates a clear surface feature.
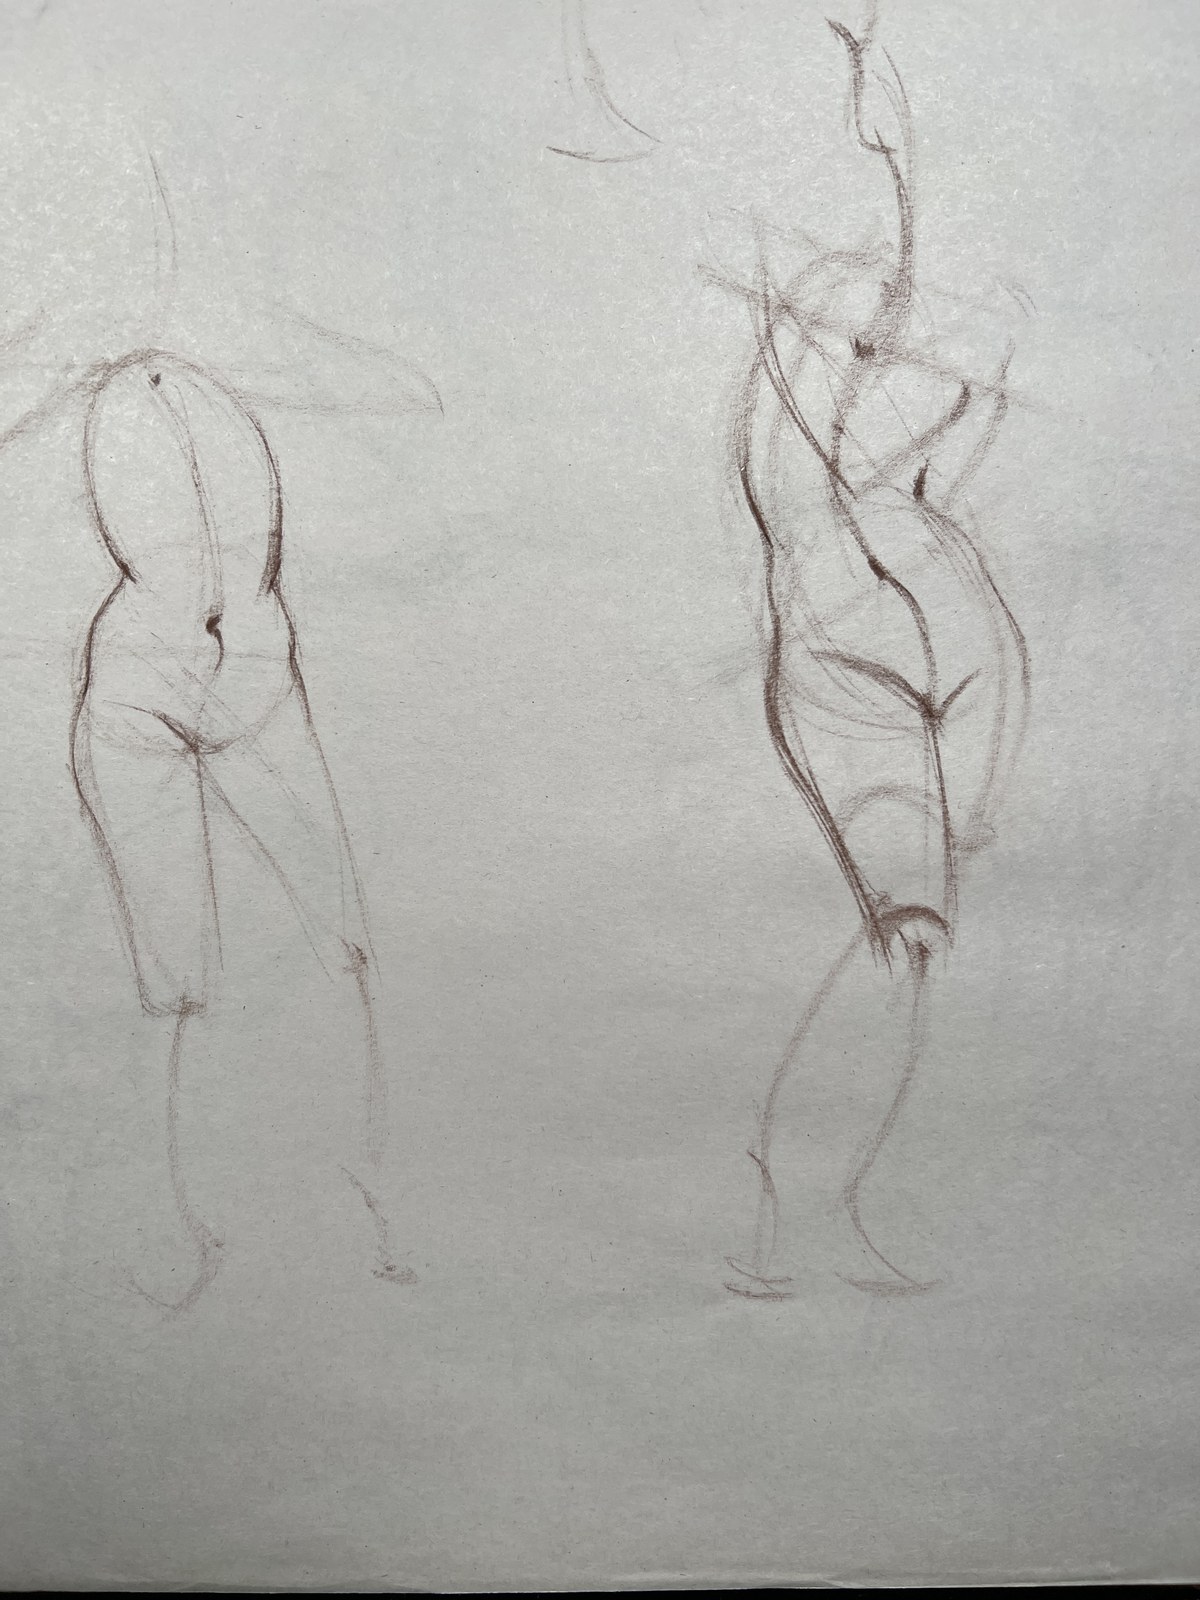
Understanding the Center Line on the Back of the Torso
Drawing the center line on the back is a little different from drawing it on the front. Instead of following the sternum and linea alba, we're primarily concerned with the path and curvature of the spine. The spine isn't straight. It has several natural curves that help support the body and maintain balance.
These curves become especially important when we view the torso from the side or at a three-quarter angle. From directly behind, the center line may appear relatively straight when the figure is upright. But as the torso turns or bends, its changing curvature becomes much easier to see.
Before we examine those curves, let's identify two important skeletal landmarks.
Seventh Cervical Vertebra
The seventh cervical vertebra, commonly called C7, is located near the base of the neck. It's often associated with a noticeable bony prominence that can be seen or felt where the neck transitions into the upper back. You can locate this area on your own body by gently running your fingers down the back of your neck.
Near the base, you'll usually feel a prominent bump. C7 is a useful reference point for establishing the upper end of the back center line, although the most prominent bump isn't always C7 in every person or position. When drawing from a model, look for this area before following the spine down through the back.
Coccyx
The coccyx, or tailbone, sits below the sacrum at the bottom of the vertebral column. It helps us understand where the spinal structure ends, but it usually isn't directly visible on the surface.
The sacral region and gluteal cleft help establish the lower midline of the back. The top of the cleft isn't the exact location of the coccyx; use these visible features to orient the pelvis and keep any estimate of the hidden tailbone light.
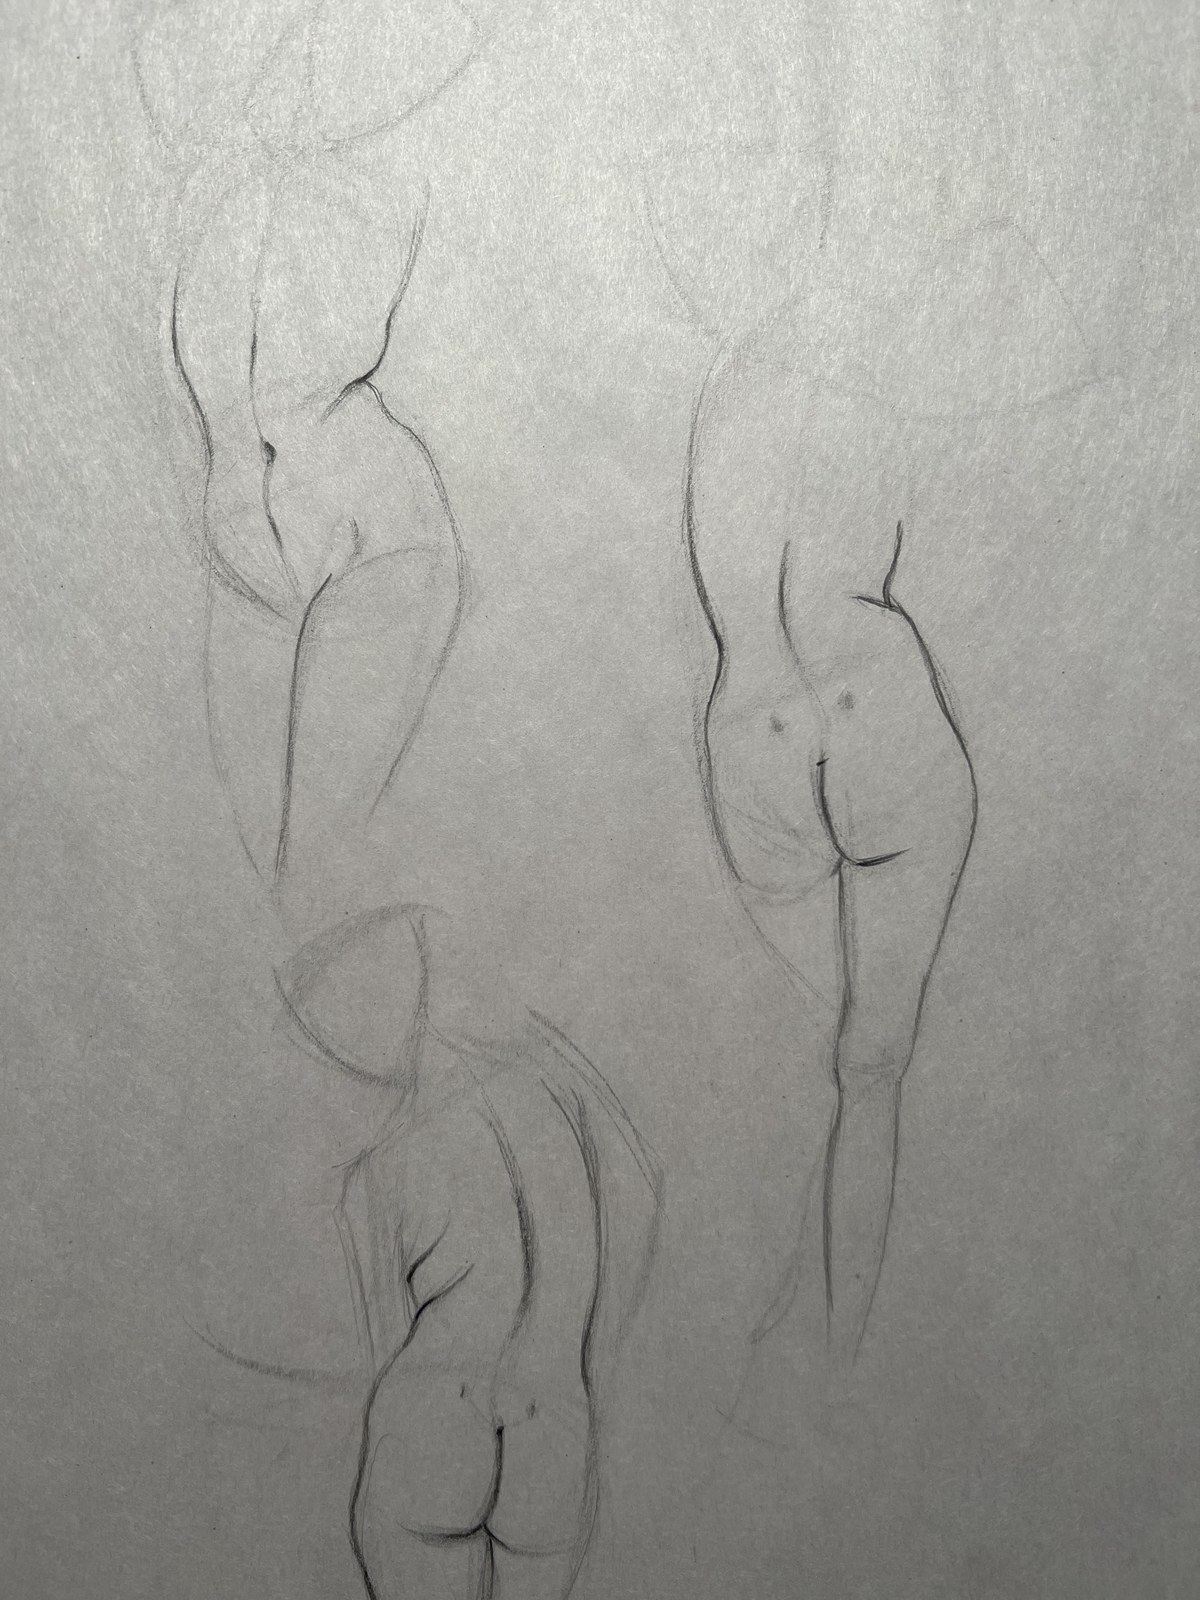
The Three Spinal Curves That Shape the Back Center Line
One of the biggest mistakes artists make when drawing the back is treating the spine as one long, evenly curved line. The back actually contains several distinct regions, each with its own curvature. For drawing the torso, we're mainly interested in three: the thoracic, lumbar, and sacral curves.
Understanding how these sections relate to one another makes it much easier to construct a believable back.
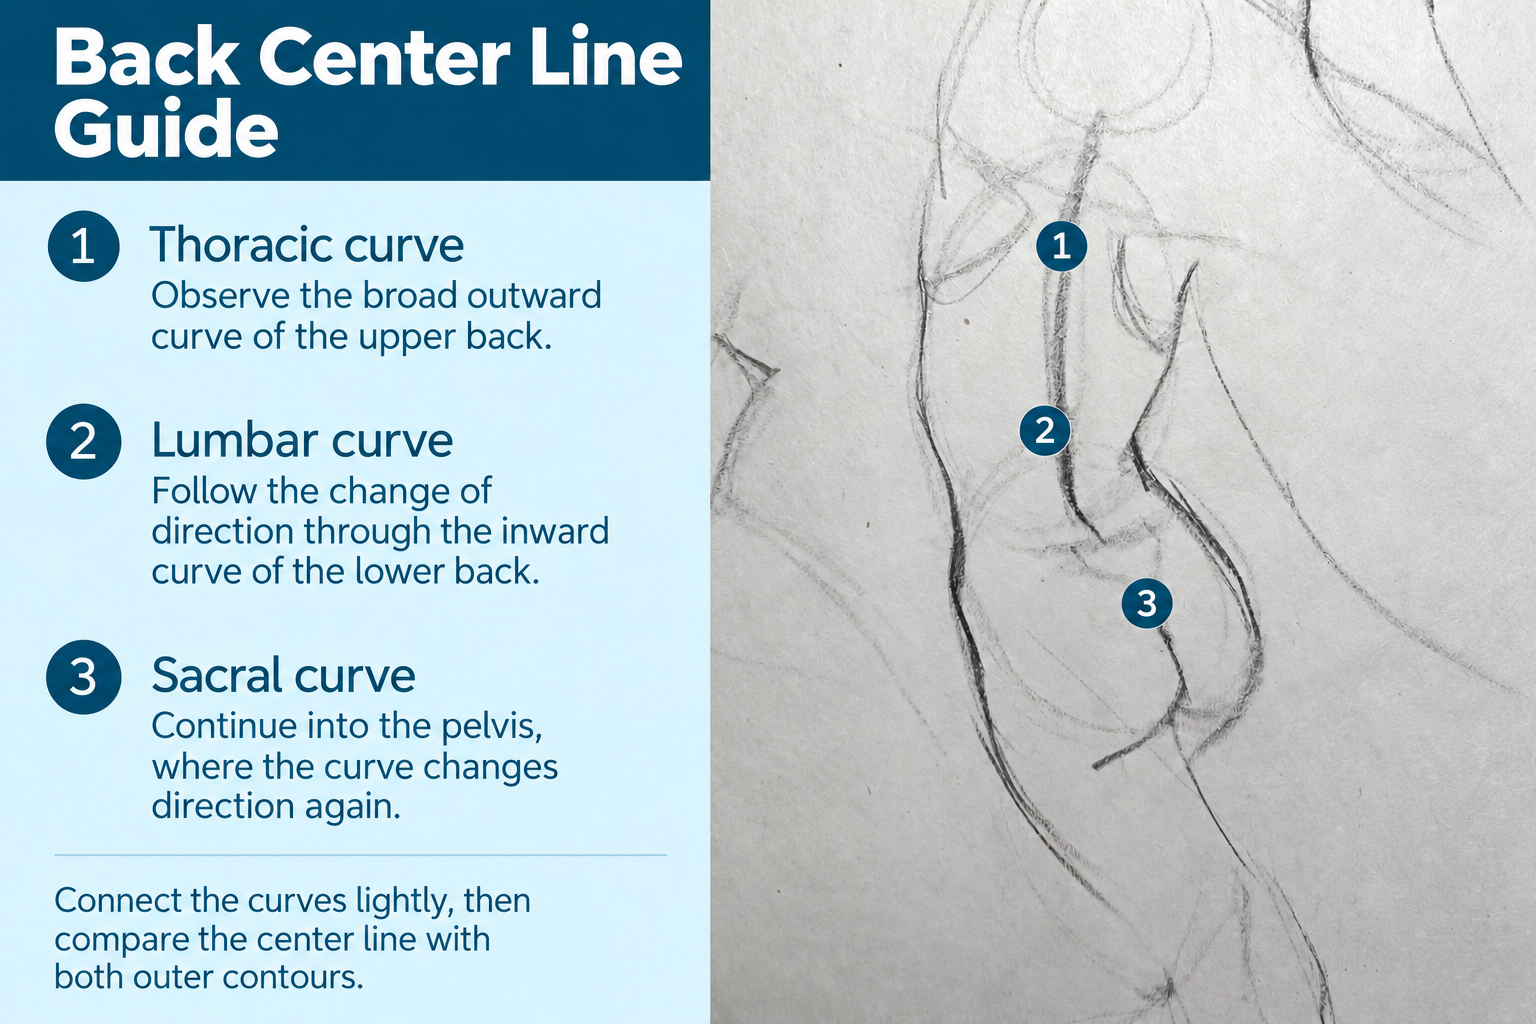
Thoracic Curve
The thoracic region occupies the upper and middle portion of the back, behind the rib cage. When viewed from the side, this part of the spine forms a long, gradual outward curve. This is the thoracic curve. Of the three regions we're discussing, the thoracic curve generally covers the greatest vertical distance.
In figure drawing, we can think of it as a broad, sweeping curve that helps establish the rounded form of the upper back. It's especially noticeable in poses where the model leans forward or rounds the shoulders. However, we shouldn't exaggerate it without considering the actual pose. The goal is to observe how the upper back curves and use that information to describe the torso's volume.
Lumbar Curve
Below the thoracic region is the lumbar spine. This portion occupies the lower back, between the rib cage and pelvis. When viewed from the side, the lumbar curve changes direction relative to the thoracic curve. Rather than continuing the same outward arc, the lumbar region curves inward toward the front of the body.
This creates an important transition in the back's silhouette and center line. The lumbar curve is generally shorter than the thoracic curve, and its direction can change considerably depending on the pose. When a model arches their lower back, this region may become more pronounced. When they bend forward, the curve may flatten or reverse.
That's why it's important to observe the actual figure rather than relying entirely on a memorized shape.
Sacral Curve
Below the lumbar spine is the sacral region. The sacrum is a triangular bone at the back of the pelvis, formed from fused vertebrae. When viewed from the side, the sacral region curves backward again, creating another change in direction. This is the sacral curve. It's shorter than the thoracic and lumbar regions and continues toward the coccyx.
In a simplified drawing, these three regions create a sequence of changing curves through the back. The thoracic region forms a broad outward curve, the lumbar region turns inward, and the sacral region curves backward again. Understanding these changes helps us avoid drawing the spine as a single generic arc.
It's also worth remembering that these are anatomical curves seen most clearly from the side. When drawing the back from other angles, their appearance will change with perspective, posture, and rotation.
How to Draw the Center Line on the Back of the Torso
The process for constructing the back center line is similar to what we did on the front. We begin with a simplified torso shape, identify useful landmarks, and then connect them while paying attention to the surface of the body. The main difference is that we're following the curves of the spine instead of the sternum and abdominal midline.
Step 1: Draw the Basic Torso Volume
Start by establishing the general shape and direction of the torso. Pay attention to the width of the shoulders, the narrowing of the waist, and the position of the pelvis. We don't need detailed anatomy at this stage. The goal is to create a simple volume that communicates how the torso is positioned in space.
Step 2: Locate C7
Find the bony prominence near the base of the neck. Mark it lightly and compare its position with the outer contours of the torso. If the body is rotated, C7 may appear closer to one visible edge. This gives us an important reference for the orientation of the upper back.
Step 3: Locate the Lower End of the Spine
Find a visible lower midline reference in the sacral region or along the gluteal cleft. Mark it lightly to establish how the pelvis faces. You don't need to pinpoint the hidden coccyx to construct a useful back center line.
Step 4: Observe the Thoracic Curve
Look at the upper back and identify the broad curve created by the thoracic region. In some poses, this curve will be clearly visible. In others, the surrounding muscles and soft tissue may make it more difficult to identify. Don't worry about tracing individual vertebrae. We're looking for the overall direction of the back's surface.
Step 5: Identify the Lumbar and Sacral Curves
Continue down toward the lower back. Look for the change in direction where the thoracic region transitions into the lumbar region. Then observe how the lower back connects with the pelvis through the sacral region. These changes may be subtle, especially when the model is standing upright. In a bending pose, they can become much more noticeable.
Step 6: Connect the Curves
Using the landmarks and surface information we've identified, construct the back center line. Pay attention to the relative length and direction of each curve. The thoracic region generally forms a longer, more gradual section, while the lumbar and sacral regions create shorter changes in direction. Remember that the line should follow the visible surface of the torso, not simply reproduce a side-view diagram of the spine.
Step 7: Evaluate the Line Against the Torso
Finally, compare the center line with the outer contours. Does it describe the orientation of the back? Does it agree with the visible curvature of the torso? If the figure is rotated, check whether the center line is positioned correctly between the silhouette edges. Refine the drawing until the center line supports the volume of the torso.
How to Position the Center Line Accurately
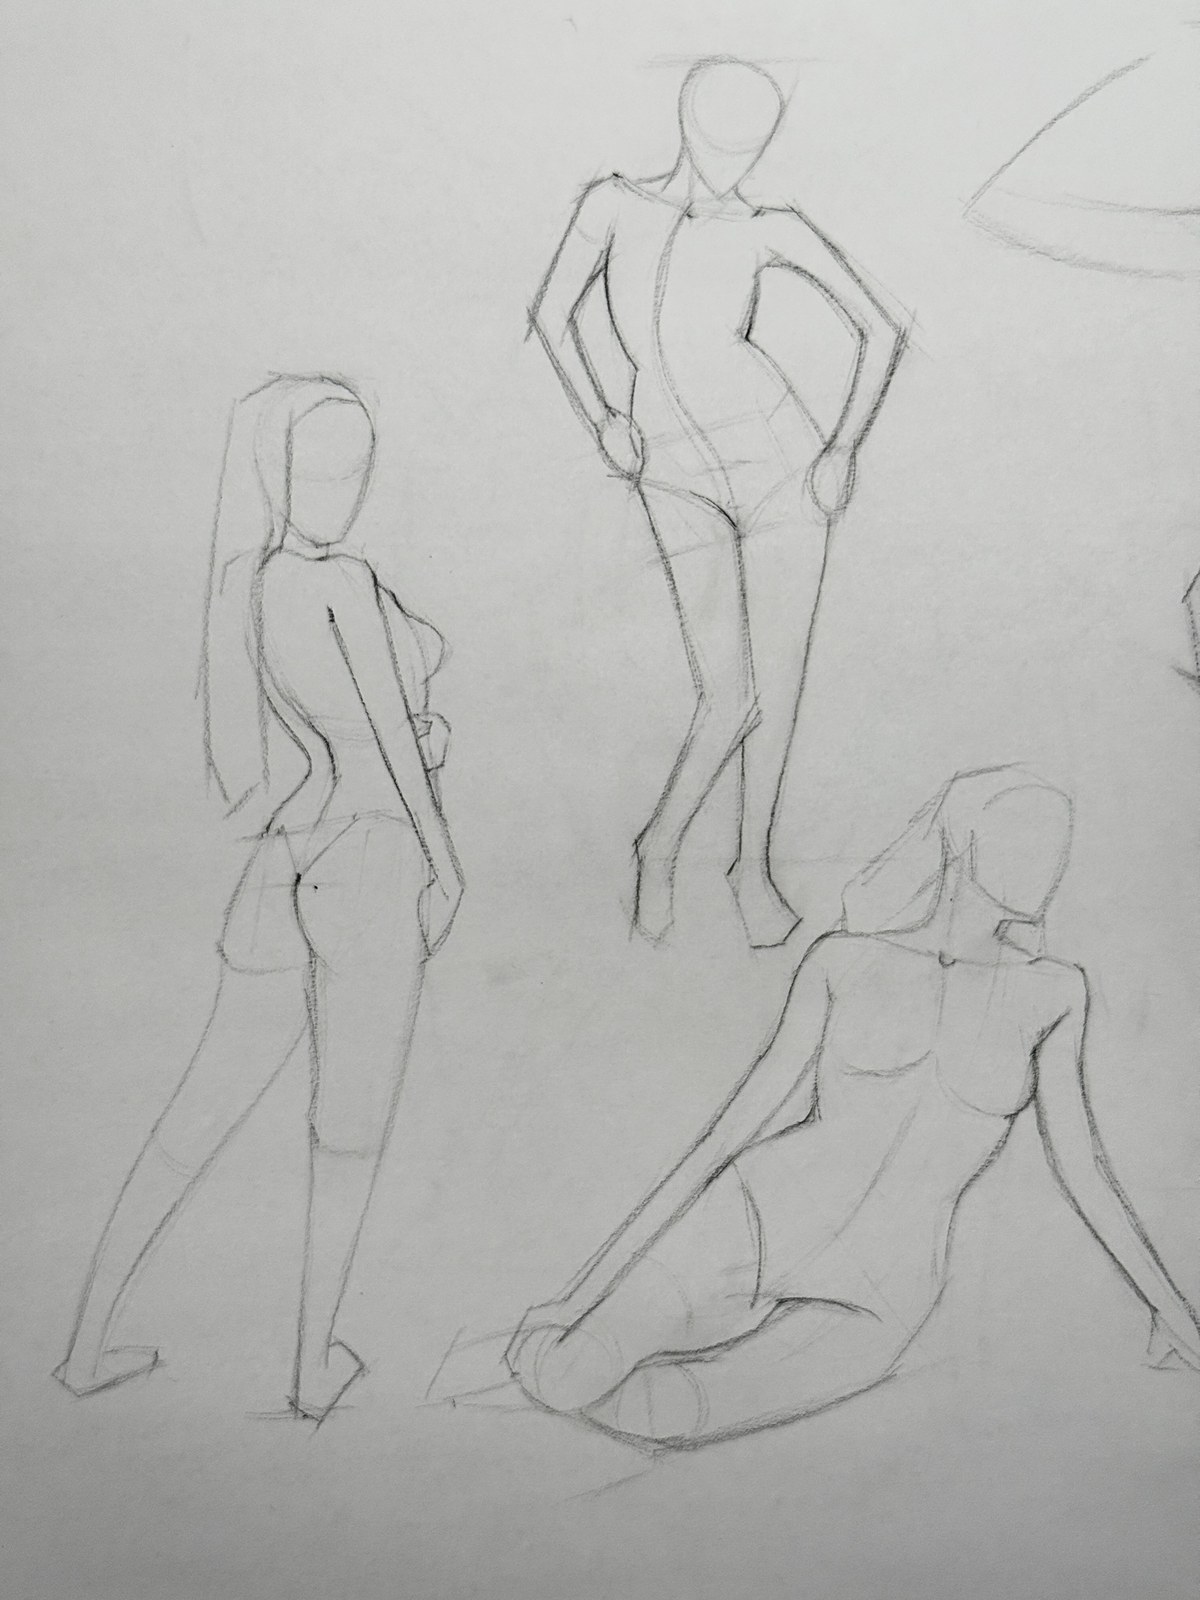
Identifying a landmark is only half the process. We also need to place it correctly in relation to the torso and the other landmarks. Use the following comparisons before committing to a stronger line.
Compare the Center Line to the Outer Contours
In a three-quarter view, the suprasternal notch may sit much closer to one visible edge than the other. Placing it halfway across the silhouette can make the chest appear to face us too directly. Check the notch, lower sternum, navel, and pelvic midline separately. How much space lies on each side? Does each placement agree with the direction of that part of the torso?
Compare the Angles Between Landmarks
Compare the angle from the suprasternal notch to the xiphoid process with the angle from the xiphoid process to the navel. Do they continue in one direction, or does the line change course? In a twisting pose, the chest and pelvis may face different directions. Establish these connected relationships first, then join them with a natural line.
Use Visible Landmarks to Infer Hidden Sections
You won't see every landmark in every pose. If the lower sternum is hidden but the notch and navel are visible, use their relationship and the rib cage's direction to estimate the missing section. On the back, the base of the neck, the sacral region, and a visible section of the spinal groove can provide enough information to suggest the remaining path. Keep inferred portions light and let observation guide the estimate.
Common Mistakes When Drawing the Torso Center Line
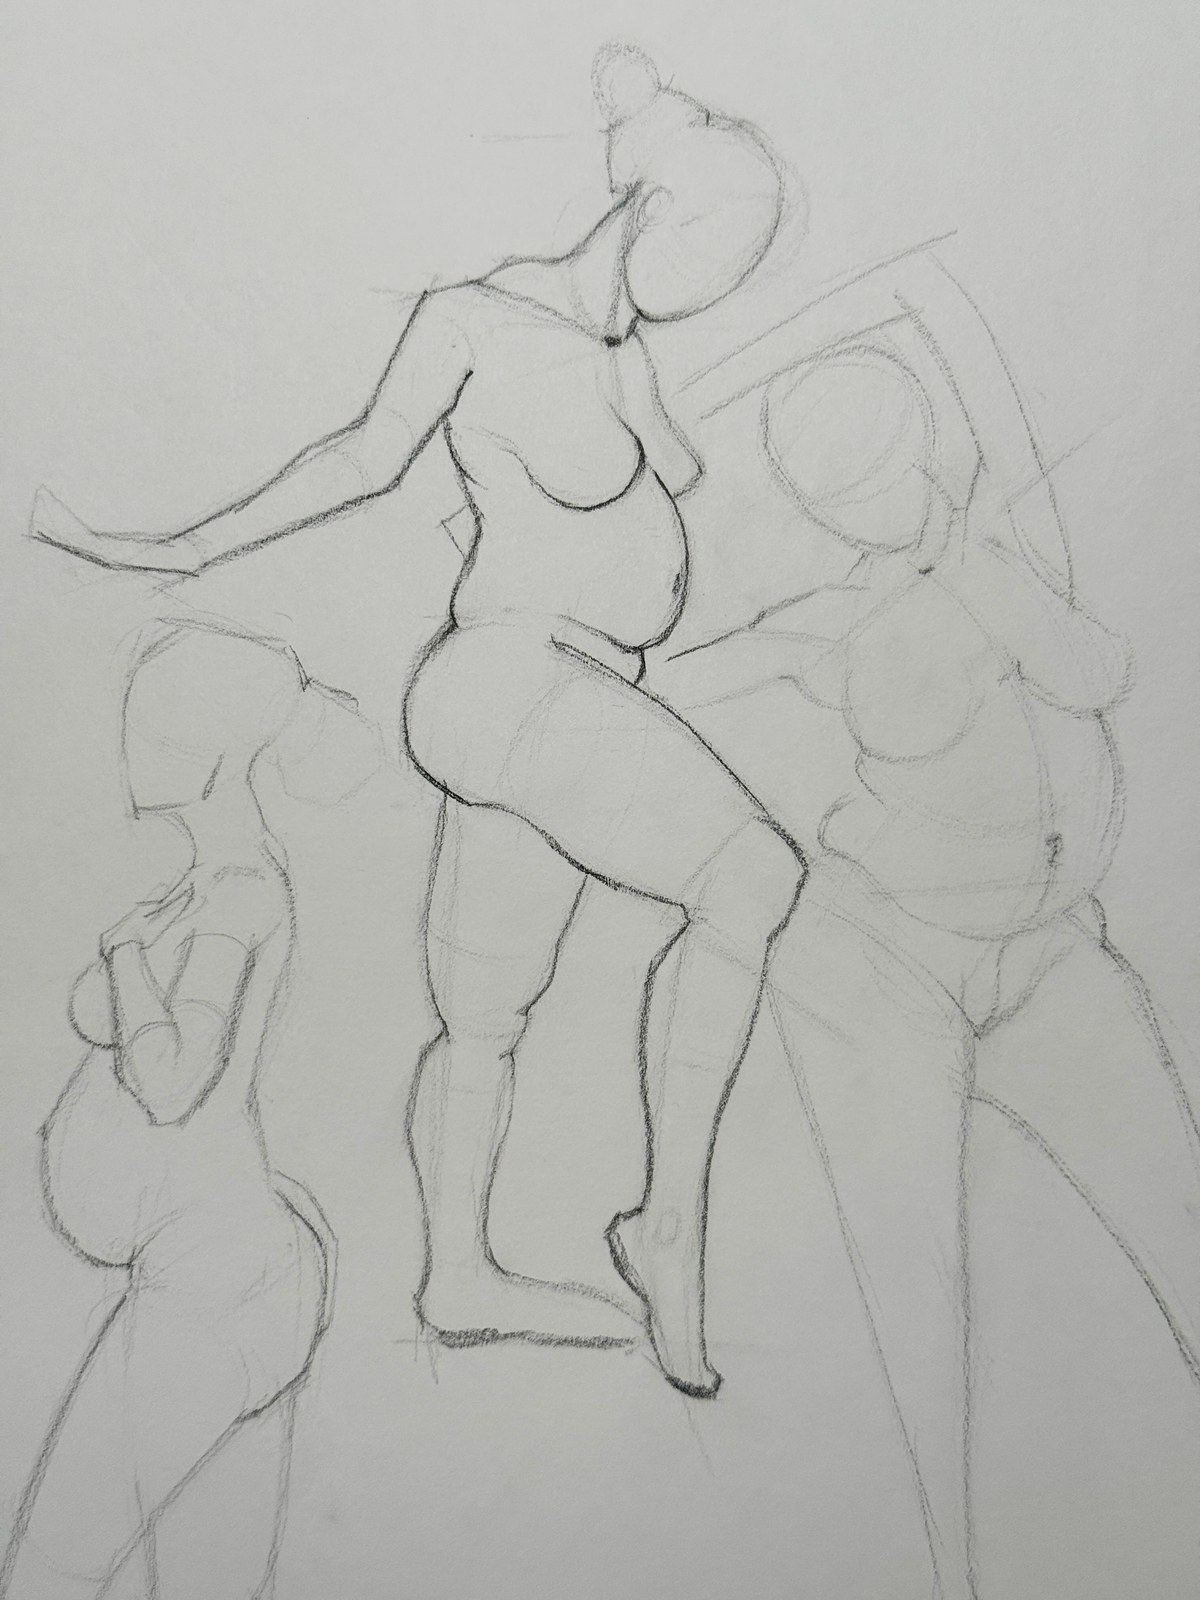
Most center line mistakes come from repeating a familiar symbol instead of checking how the torso's surface behaves in the pose.
Drawing a Straight Line Through Every Torso
A straight line can suit an upright, front-facing torso. Repeating it through every bending or twisting pose loses the changes in direction between the chest, abdomen, and pelvis. Observe those relationships before choosing the line.
Placing the Center Line Exactly in the Middle
The anatomical midline doesn't always appear halfway between the visible contours. When the torso turns, compare the width on each side of the line and check where the front surface faces.
Ignoring Anatomical Landmarks
A pleasing curve may still disagree with the body. Anchor it to the suprasternal notch, lower sternum, navel, or visible back landmarks. Even two or three reliable points improve the construction.
Drawing the Spine as One Continuous Curve
A single, evenly curved arc misses the transitions between the thoracic, lumbar, and sacral regions. Observe those regions separately, then connect them according to the pose and viewing angle.
Making Every Section Equally Dark
Some sections correspond to visible grooves or landmarks; others are construction guides. Keep inferred sections light and strengthen only the features you actually want to show in the finished drawing.
How the Center Line Improves Figure Drawing
The center line clarifies how the chest, abdomen, and pelvis relate in a complex pose. When the shoulders turn one way and the pelvis turns another, it helps describe the surface connecting them. That orientation also guides the placement of the chest muscles, abdominal muscles, and other details. Establishing the torso's volume first gives those details a clearer foundation.
When drawing from imagination, construct the rib cage and pelvis, choose their directions, and carry the center line across their surfaces. Use reference to check the result and develop your understanding of the anatomy.
Conclusion: Use the Center Line to Give Your Torso Drawings Volume
The center line of the torso helps us describe direction, volume, bending, and rotation with very little drawing. Begin with a simple torso form, locate a few useful landmarks, and compare their positions before connecting them. On the front, follow the sternum and abdominal midline. On the back, observe the spinal groove and the changing curves of the torso. You don't need to see every landmark: a few reliable reference points can be enough to construct a convincing form.
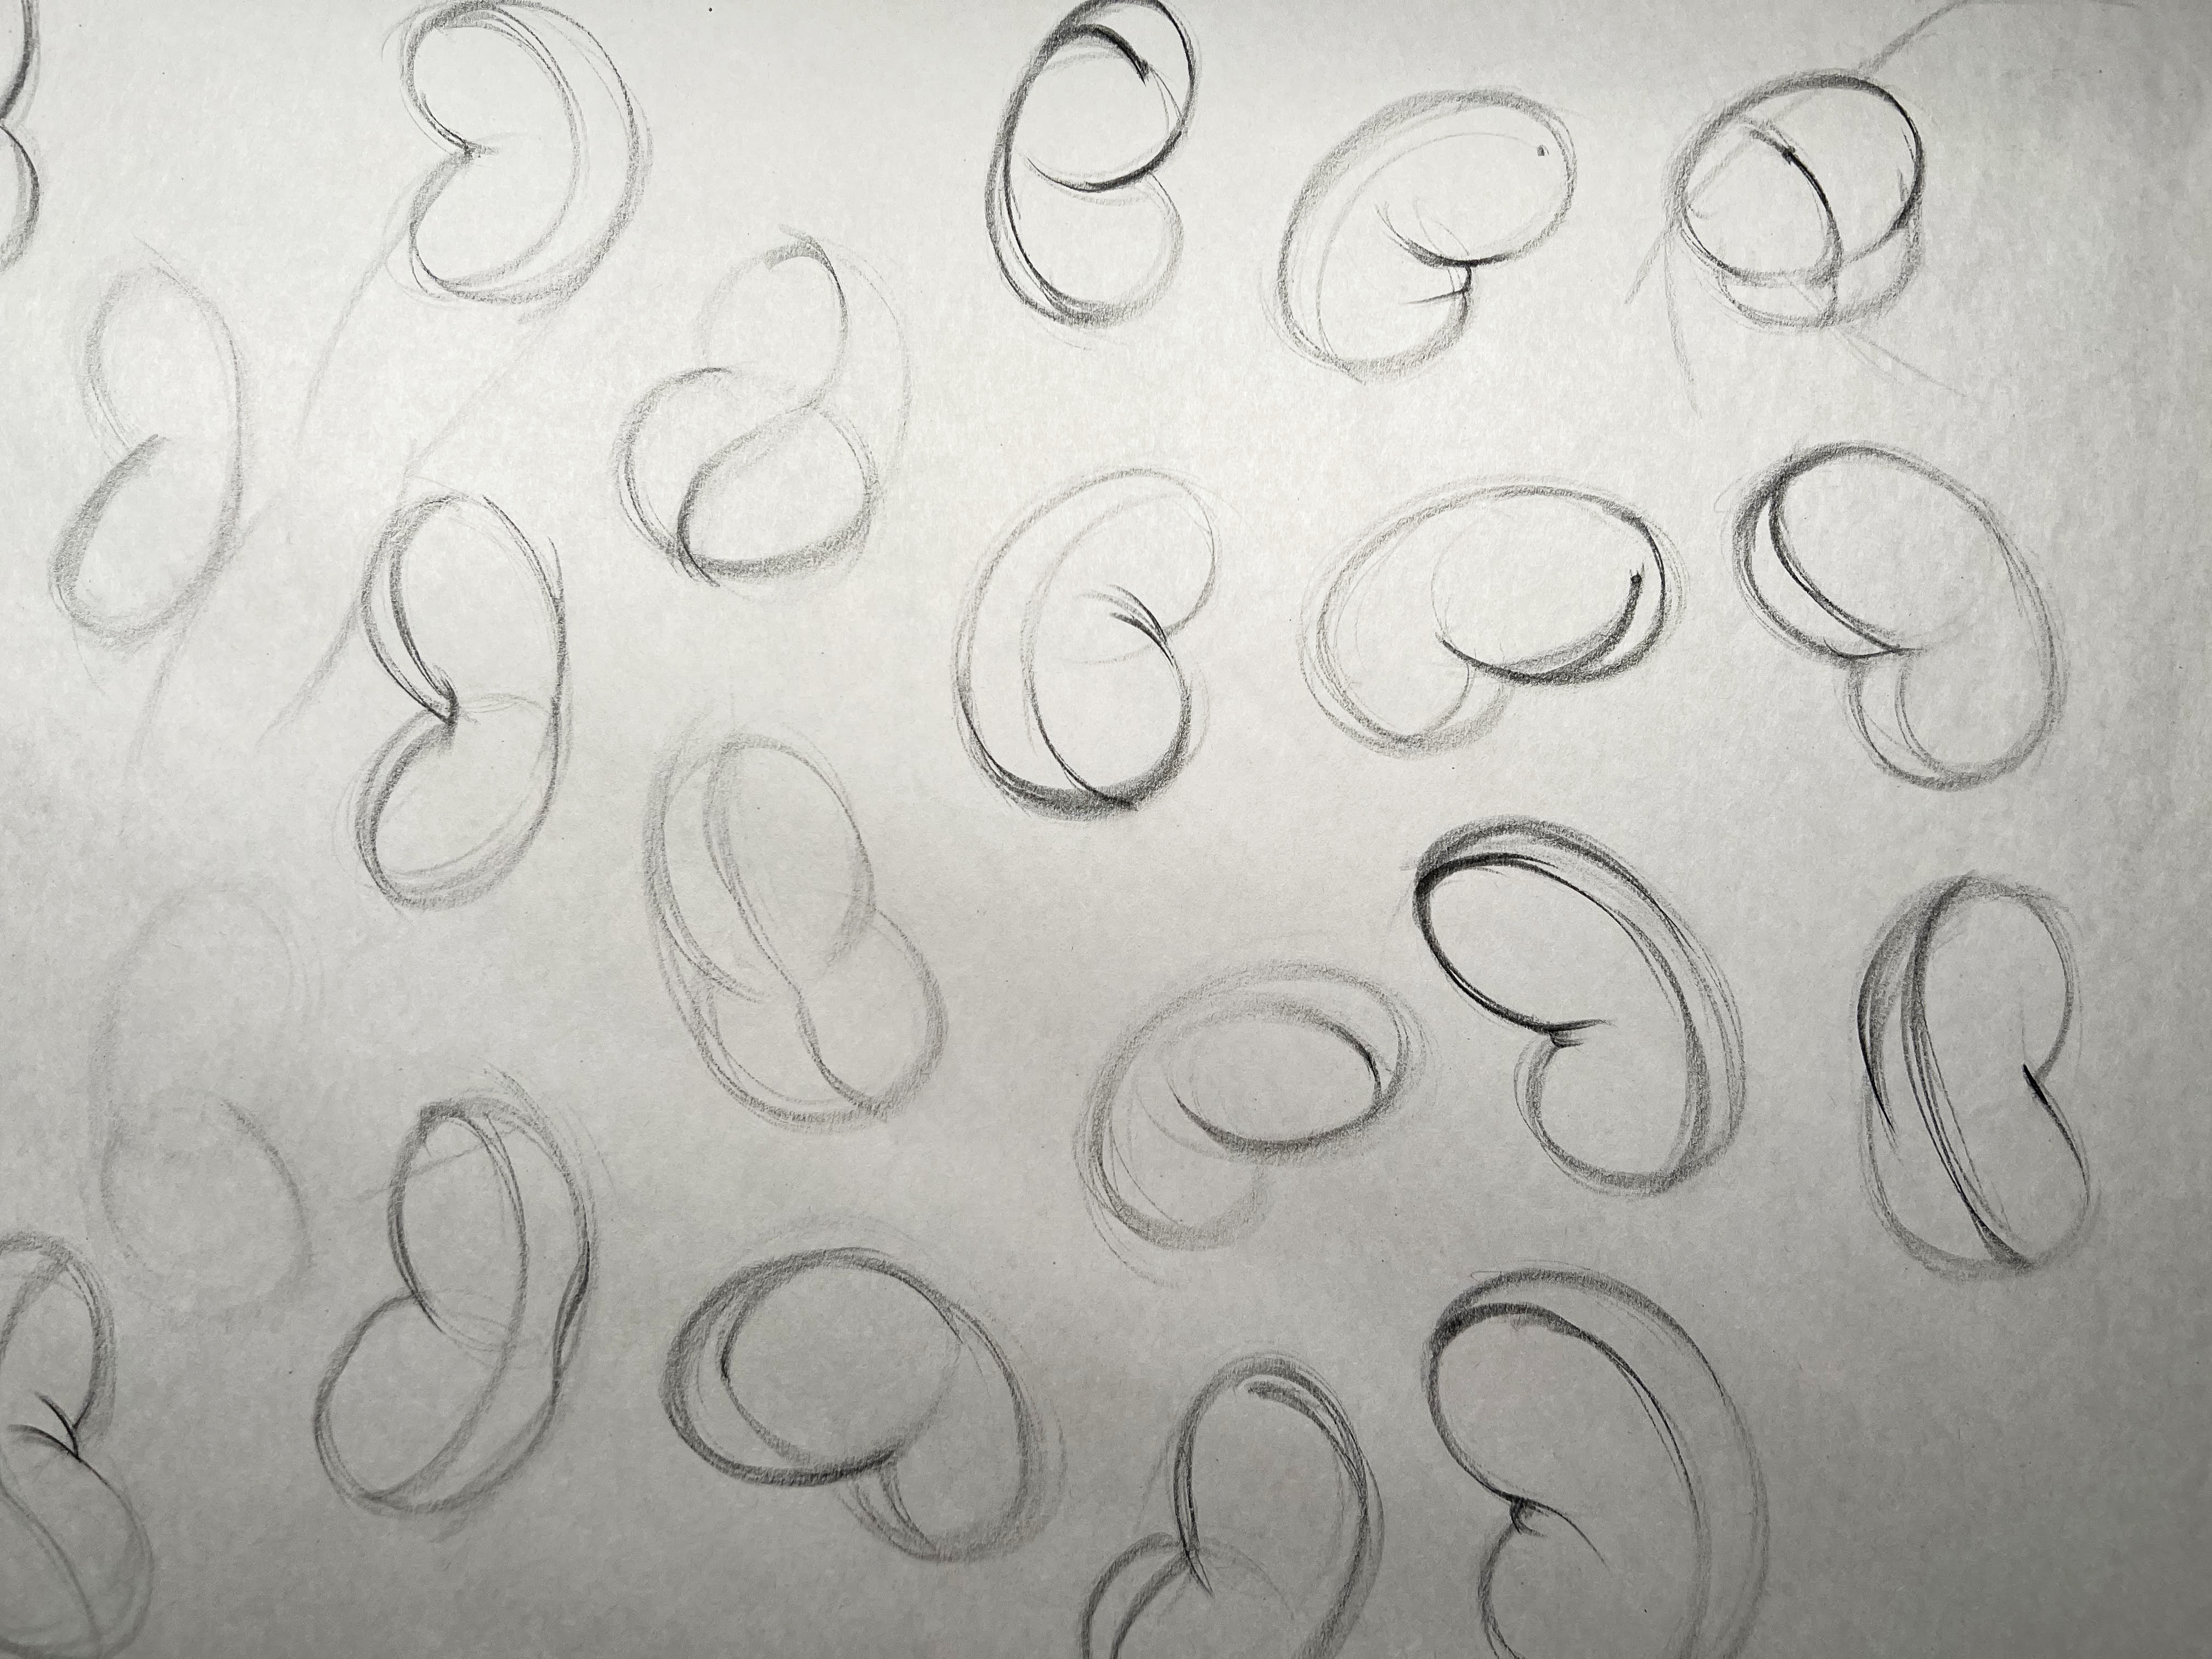
Quick Practice: One-Minute Bean Studies
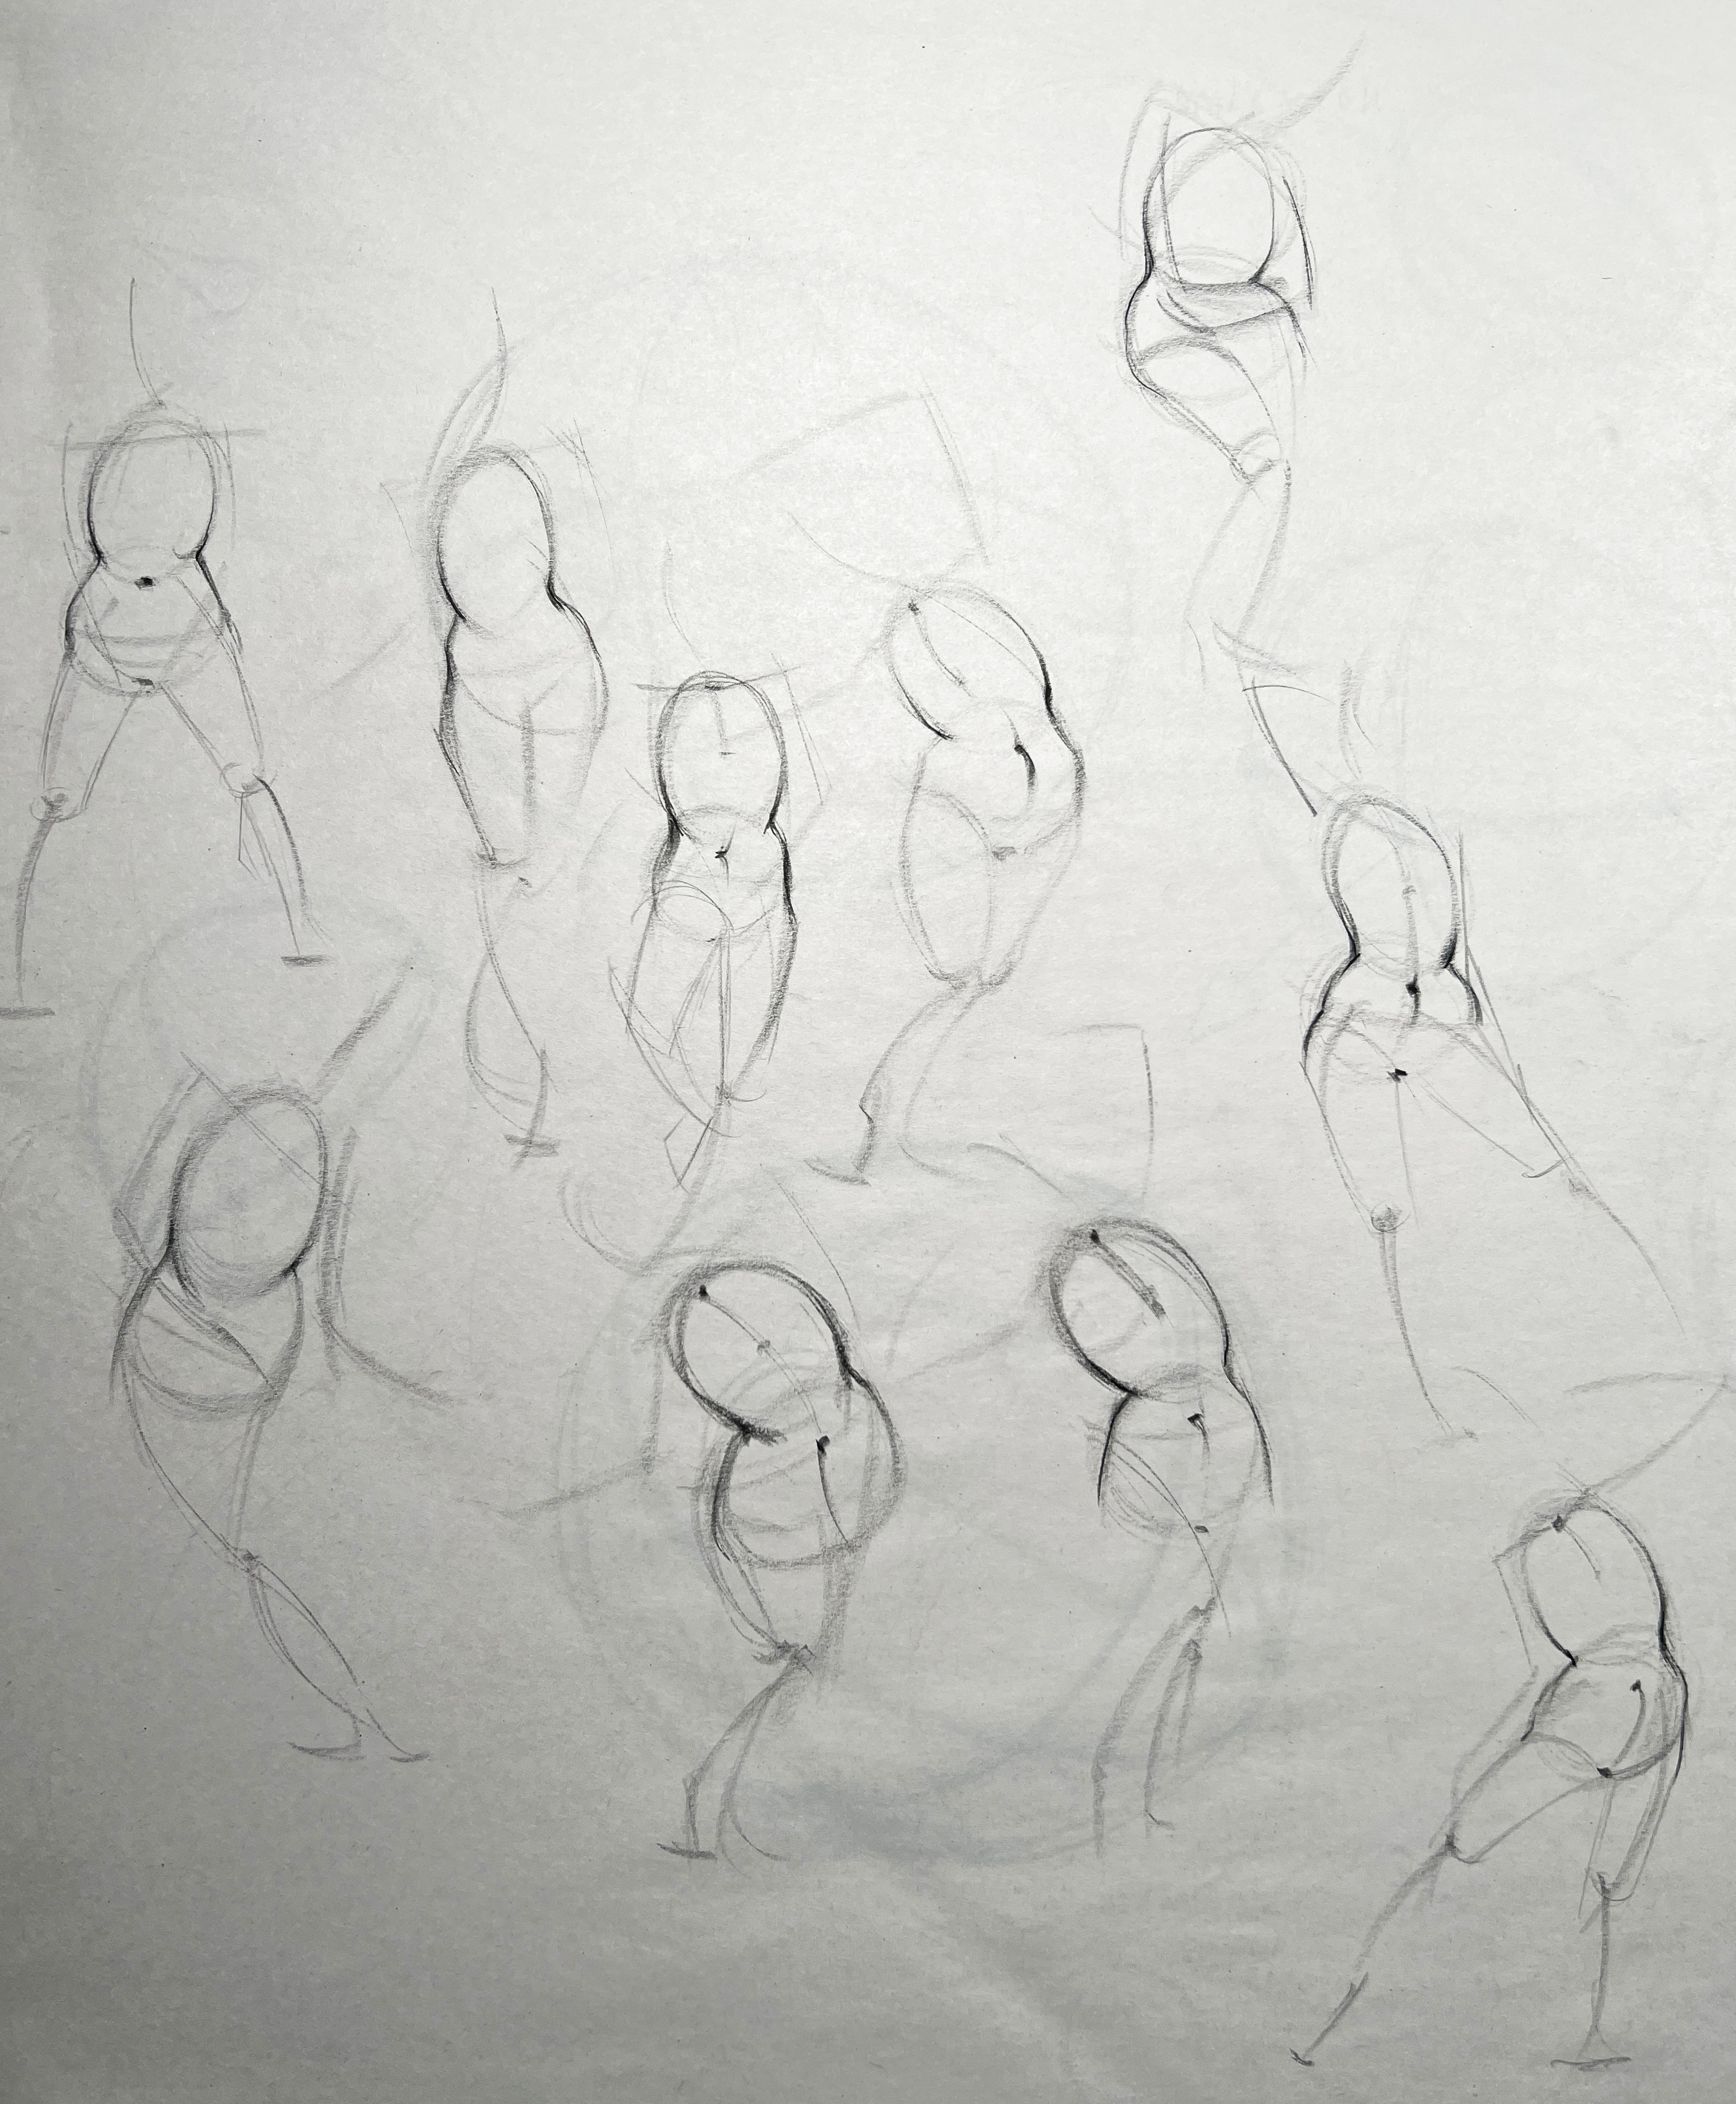
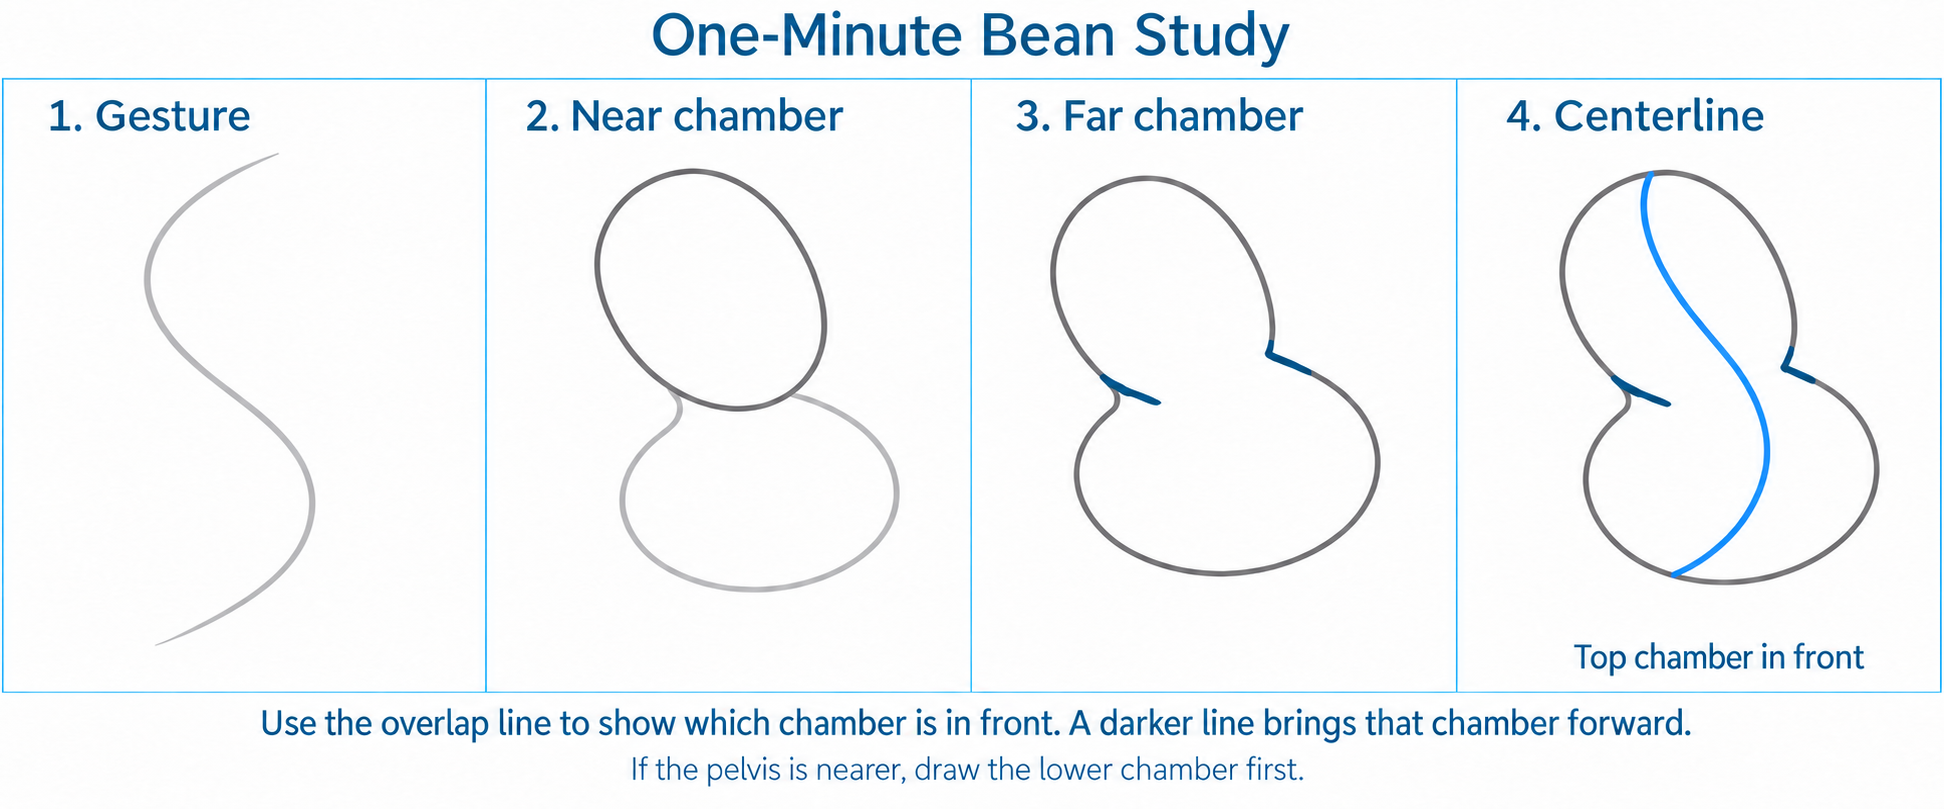
Set a timer for one minute per pose and study the torso in your reference. Reduce it to a soft, two-chambered bean: one chamber for the rib cage and one for the pelvis. Let the chambers bend, tilt, and twist relative to each other.
Your bean may barely resemble a human torso, and that's fine for this exercise. Focus on the direction of the twist, the centerline, and which chamber sits in front. Leave out muscles, limbs, and the model's exact outer shape.
- Start with the gesture. Make a light, simple curve that captures the torso's overall bend and direction. Use it to guide the bean.
- Draw the nearer chamber first. Decide whether the rib cage or pelvis is closer to you. Begin with the upper chamber if the rib cage is in front, or the lower chamber if the pelvis is in front.
- Add the other chamber behind it. Connect the two into one soft bean. Use the overlap line to show which chamber is nearer. Make that short line darker to help bring the nearer chamber forward. Look for a pinch on the compressed side and a longer curve on the stretched side.
- Add the centerline. Carry a light line over the surfaces of both chambers. Let its position and changes in direction show how the rib cage and pelvis turn. Check that it agrees with the overlap.
When the minute ends, move to the next pose. Keep asking: which chamber is in front, where does each chamber face, and does the centerline make that twist clear?
20 poses · 1 minute each · 20 minutes of bean practice
Draw 20 one-minute posesDraw one bean per reference. Keep the gesture, overlap, and centerline clear.